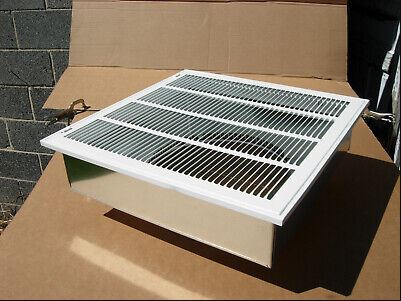
If you’re looking to improve your HVAC system’s efficiency or need to replace an outdated filter size, Converting 18×20 filter box to 20×20 filter box can be a practical solution. This guide will walk you through the process step by step, providing the necessary tools, tips, and considerations for the job.
Why Upgrade to a 20×20 Filter Box?
Switching to a 20×20 filter box has several benefits:
- Increased Airflow Efficiency: A larger filter allows more air to flow through the system, reducing strain on the HVAC unit.
- Wider Availability: 20×20 filters are more commonly available in stores and online.
- Improved Filtration: Larger filters can trap more particles, improving indoor air quality.
Tools and Materials You’ll Need
Before starting, gather the following tools and materials:
| Tool/Material | Purpose |
|---|---|
| Measuring tape | For accurate measurements |
| Tin snips or metal cutter | To resize the ductwork |
| Drill and screws | For attaching components |
| Sheet metal | To cover gaps or create extensions |
| HVAC sealant or tape | To seal the connections |
| 20×20 filter box | The replacement component |
Step-by-Step Guide to Converting the Filter Box
Follow these steps to ensure a smooth conversion process:
1: Measure Your Existing Filter Box
- Remove the current filter.
- Use a measuring tape to confirm the dimensions of the existing box (18×20).
- Measure the available space in the ductwork to ensure a 20×20 box will fit.
2: Purchase the New 20×20 Filter Box
- Choose a high-quality 20×20 filter box compatible with your HVAC system.
- Verify its construction material matches your existing ductwork for easy installation.
3: Remove the Old Filter Box
- Turn off the HVAC system to ensure safety.
- Unscrew and detach the 18×20 filter box.
- Inspect the surrounding area for any damage or debris.
4: Modify the Ductwork
- Use tin snips or a metal cutter to widen the opening in the ductwork to accommodate the larger filter box.
- Ensure the cut edges are smooth to avoid injuries or damage during installation.
5: Install the 20×20 Filter Box
- Align the new filter box with the modified ductwork.
- Use screws and a drill to secure the filter box in place.
- Seal the connections with HVAC tape or sealant to prevent air leaks.
6: Insert the New Filter
- Place a 20×20 filter inside the new box.
- Ensure it fits snugly and is oriented correctly based on airflow direction markings.
Common Challenges and How to Overcome Them
| Challenge | Solution |
|---|---|
| Insufficient duct space | Adjust or extend the ductwork using sheet metal. |
| Air leaks around connections | Use additional HVAC sealant or tape for a tight seal. |
| Difficulty cutting metal | Ensure your tools are sharp and designed for HVAC work. |
Maintenance Tips for Your New Filter Box
- Check Filters Regularly: Inspect your filter every 1-3 months for dirt and debris.
- Replace as Needed: Replace the filter when it appears clogged to maintain airflow.
- Clean Ducts Periodically: Keep the ductwork clean to enhance system performance.
Conclusion
Converting 18×20 filter box to 20×20 filter box is a straightforward process that can improve your HVAC system’s efficiency and air quality. With proper measurements, tools, and careful installation, you can complete the project in just a few hours. Regular maintenance will ensure your system runs smoothly for years to come.
By upgrading your filter box, you not only optimize your HVAC performance but also create a healthier living environment. Make sure to follow the steps carefully and consult a professional if you encounter any difficulties.


